---
url: /column-cod-toys/02-feature-card.md
description: 上一章節我們完成了快捷鍵開關視窗功能,這一章節我們來實作功能選項部分吧!
---
{.cover}
# CodToys - EP02:功能選項
上一章節我們完成了快捷鍵開關視窗功能,這一章節我們來實作功能選項部分吧!
## 開發
本章節預計會建立以下內容:
* 輸入候選:在輸入框輸入內容時,會顯示候選功能選項
* 功能選項:提供使用者選擇功能,且可以透過滑鼠或鍵盤選擇
* 建立「搜尋顏文字、Google 搜尋」功能
### 功能選項元件
第一步讓我們新增功能選項元件
`src\components\feature-option.vue`
```vue
{{ props.text }}
```
此元件負責呈現可用的功能選項,並且可以透過 `action` 來設定點擊後的行為。
滑鼠 `hover` 或使用鍵盤選擇時,會變更背景色,這裡預留 `selected`,晚點來實作鍵盤導航功能。
在使用 `feature-option` 元件前,先讓我們封裝一下目前的輸入框元件。
`src\components\main-input.vue`
```vue
```
最後在首頁中引入 `feature-option` 與 `main-input` 元件。
`src\pages\index.vue`
```vue
```
看起來是不是乾淨很多呢?%ヾ(◍'౪\`◍)ノ゙%
現在讓我們打開視窗。
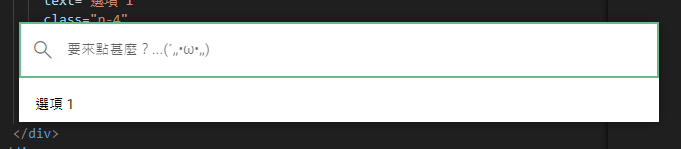
...會發現「選項 2」被切掉啦!%Σ(ˊДˋ;)%
這是因為視窗高度沒有隨著內容增加而增加,讓我們來修正一下吧。
### 自動調整視窗高度
由於視窗由 main process 控制,我們需要讓視窗與 main process 通訊並調整視窗大小。
使用 `preload.ts` 來對 renderer process,也就是網頁視窗提供直通 main process 的 API 吧。
::: tip 甚麼 process?(\*´・д・)
Electron 基於 multi-process 架構,[詳細請參考官方文件](https://www.electronjs.org/docs/latest/tutorial/process-model)。
:::
`electron\preload.ts`
```ts
import { contextBridge, ipcRenderer } from 'electron'
contextBridge.exposeInMainWorld('main', {
updateHeight(height: number) {
return ipcRenderer.send('updateHeight', height)
},
hideWindow() {
return ipcRenderer.send('hideWindow')
},
})
```
[`ipcRenderer`](https://www.electronjs.org/docs/latest/api/ipc-renderer) 模組提供了 `send` 方法,可以將事件發送到 main process。
[`contextBridge`](https://www.electronjs.org/docs/latest/api/context-bridge) 模組則負責將 `main` 物件注入在 window 中,我們可以在網頁中使用 `window.main` 來呼叫 main process 的方法。
接著我們要在 main process 中接收這些事件,使用 `ipcMain` 模組來收聽事件,順便重構一下 main 程式碼。
`electron\main.ts`
```ts
import path from 'node:path'
import process from 'node:process'
import {
app,
BrowserWindow,
globalShortcut,
ipcMain,
screen,
} from 'electron'
async function createInputWindow() {
const display = screen.getPrimaryDisplay()
const newWindow = new BrowserWindow({
width: display.bounds.width / 3,
height: 100,
show: false,
backgroundColor: '#fff',
frame: false,
resizable: false,
webPreferences: {
preload: path.join(__dirname, './preload.js'),
},
})
// 隱藏預設系統選單
newWindow.setMenu(null)
// 失去焦點時自動隱藏視窗
newWindow.on('blur', () => {
newWindow.hide()
})
if (process.env.VITE_DEV_SERVER_URL) {
await newWindow.loadURL(process.env.VITE_DEV_SERVER_URL)
}
else {
await newWindow.loadFile('dist/index.html')
}
return newWindow
}
function initGlobalShortcut(mainWindow: BrowserWindow) {
const ret = globalShortcut.register('Ctrl+Space', () => {
if (mainWindow?.isVisible()) {
// focusable 設為 false,才可以讓焦點回到原本位置。例如正在輸入的編輯器
mainWindow.setFocusable(false)
mainWindow.hide()
return
}
const cursorPoint = screen.getCursorScreenPoint()
const display = screen.getDisplayNearestPoint(cursorPoint)
// 設定滑鼠位置之視窗中間往上 1/3 的位置
const [width, height] = mainWindow.getSize()
if (!width || !height)
return
mainWindow?.setPosition(
Math.floor(display.bounds.x + display.bounds.width / 2 - width / 2),
Math.floor(display.bounds.y + display.bounds.height / 3 - height / 2),
)
mainWindow.setFocusable(true)
mainWindow.show()
})
if (!ret) {
console.error('registration failed')
}
}
function initIpcMain(mainWindow: BrowserWindow) {
ipcMain.on('updateHeight', (event, height: number) => {
mainWindow.setBounds({ height })
})
ipcMain.on('hideWindow', (event) => {
mainWindow.setFocusable(false)
mainWindow.hide()
})
}
app.whenReady().then(async () => {
const mainWindow = await createInputWindow()
initGlobalShortcut(mainWindow)
initIpcMain(mainWindow)
})
app.on('window-all-closed', () => {
if (process.platform !== 'darwin') {
app.quit()
}
globalShortcut.unregisterAll()
})
```
現在我們需要在網頁中使用 `mainApi`,既然是 TypeScript 專案,第一步當然是定義型別啦。
`electron\electron-env.d.ts`
```ts
export interface MainApi {
updateHeight: (height: number) => void;
hideWindow: () => void;
}
declare global {
interface Window {
main: MainApi;
}
}
export { }
```
接著把 `contextBridge` 模組注入的 `main` 物件透過 Composition API 形式提供,保留未來更動彈性。
`src\composables\use-main-api.ts`
```ts
/** 提供 Electron main process API */
export function useMainApi() {
return window.main
}
```
現在讓視窗根據內容高度自動調整,使用 `useElementBounding` 輕鬆完成!%ヽ(●\`∀´●)ノ%
```vue
// ...
```
現在開啟視窗,可以看到這次選項 2 順利出現了。
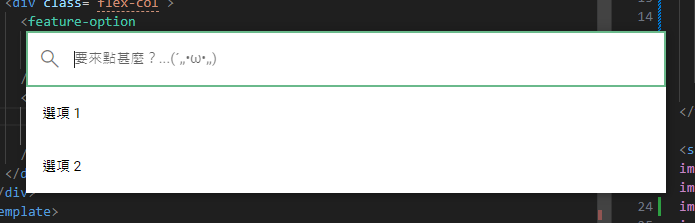
最後我們把原本在 `main.ts` 中的「視窗 blur 時自動隱藏視窗」的邏輯移到首頁中,方便未來依頁面需求自定義。
`electron\main.ts`
```ts
// ...
async function createInputWindow() {
// ...
// 失去焦點時自動隱藏視窗 // [!code --]
newWindow.on('blur', () => { // [!code --]
newWindow.hide() // [!code --]
}) // [!code --]
// ...
}
// ...
```
所以網頁中要怎麼判斷視窗是否 blur?%(´・ω・\`)%
其實很簡單,透過 `useWindowFocus` 輕鬆實現!
`src\pages\index.vue`
```vue
// ...
```
感恩 VueUse!讚嘆 VueUse!(\*´∀\`)~♥
### 鍵盤導航
選項有了,那就來實作鍵盤導航功能吧。
這裡讓 `feature-option` 元件註冊自己的 ID,透過 ID 選擇可用的 option。
建立一個 `feature.store.ts` 來管理並註冊 option。
`src\stores\feature.store.ts`
```ts
import { defineStore } from 'pinia'
import { pipe, sortBy } from 'remeda'
import { computed, ref, shallowRef, triggerRef } from 'vue'
interface OptionValue {
action: () => void;
}
export const useFeatureStore = defineStore('feature', () => {
const optionMap = shallowRef(new Map())
const optionIdList = computed(() => pipe(
[...optionMap.value.keys()],
/** 依照數字排序,保證 option 順序 */
sortBy((id) => Number.parseInt(id.replace(/\D/g, ''), 10)),
))
function addOption(id: string, value: OptionValue) {
optionMap.value.set(id, value)
triggerRef(optionMap)
}
function removeOption(id: string) {
optionMap.value.delete(id)
triggerRef(optionMap)
}
const selectedOptionId = ref('')
function setOption(id: string) {
selectedOptionId.value = id
}
function nextOption() {
const first = optionIdList.value.at(0)
const index = optionIdList.value.indexOf(selectedOptionId.value)
if (index < 0 && first) {
selectedOptionId.value = first
return
}
const target = optionIdList.value[index + 1]
if (target || first) {
selectedOptionId.value = (target ?? first)!
}
}
function prevOption() {
const last = optionIdList.value.at(-1)
const index = optionIdList.value.indexOf(selectedOptionId.value)
if (index < 0 && last) {
selectedOptionId.value = last
return
}
const target = optionIdList.value[index - 1]
if (target || last) {
selectedOptionId.value = (target ?? last)!
}
}
const currentOption = computed(() => optionMap.value.get(selectedOptionId.value))
return {
optionIdList,
addOption,
removeOption,
selectedOptionId,
setOption,
nextOption,
prevOption,
currentOption,
}
})
```
`feature.store` 主要提供以下邏輯:
* 註冊、移除 option
* 設定或前後選擇 option
接著在 `feature-option` 新增邏輯:
* 註冊自己的 ID 與 `action`
* `onUnmounted` 時移除 ID。
* `selected` 依照 `feature.store` 資料判斷
`src\components\feature-option.vue`
```vue
// ...
```
最後讓我們在 `main-input` 中註冊鍵盤事件,實現鍵盤選擇選項功能。
`src\components\main-input.vue`
```vue
// ...
```
現在我們可以透過鍵盤觸發以下功能:
* Escape 清空輸入框,若內容為空則隱藏視窗
* 上下鍵選擇選項
* Enter 執行選項。
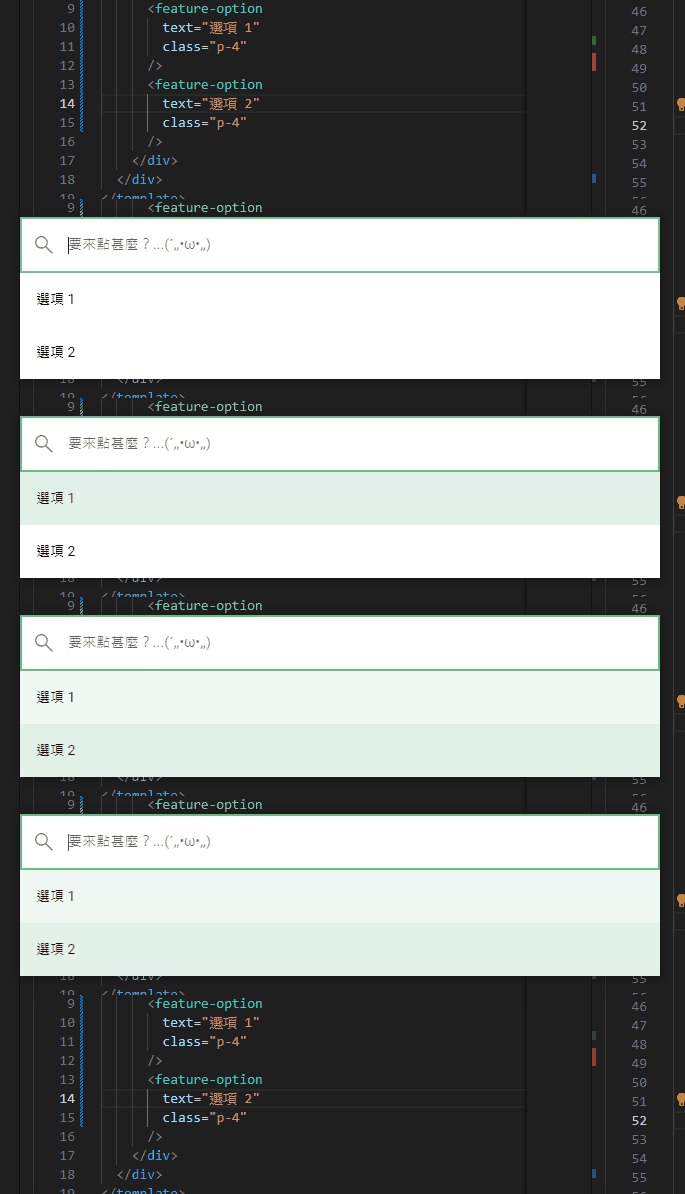
越來越有模有樣了!%✧⁑。٩(ˊᗜˋ\*)و✧⁕。%
### 新增功能卡片
接著讓我們新增功能卡片,功能卡片會自動根據使用者輸入內容提供可用選項。
可預期每個卡片都會有自己的專屬邏輯,所以我們將卡片元件獨立在 `domains` 資料夾中。
#### 搜尋顏文字
`src\domains\feature-card-kaomoji\index.vue`
```vue
```
因為還沒連接資料庫,所以先暫時寫死 3 個顏文字測試功能。
接著在首頁中引入功能卡片。
`src\pages\index.vue`
```vue
```
現在輸入 `@` 即可搜尋顏文字,而且選擇後可以直接複製到剪貼簿。
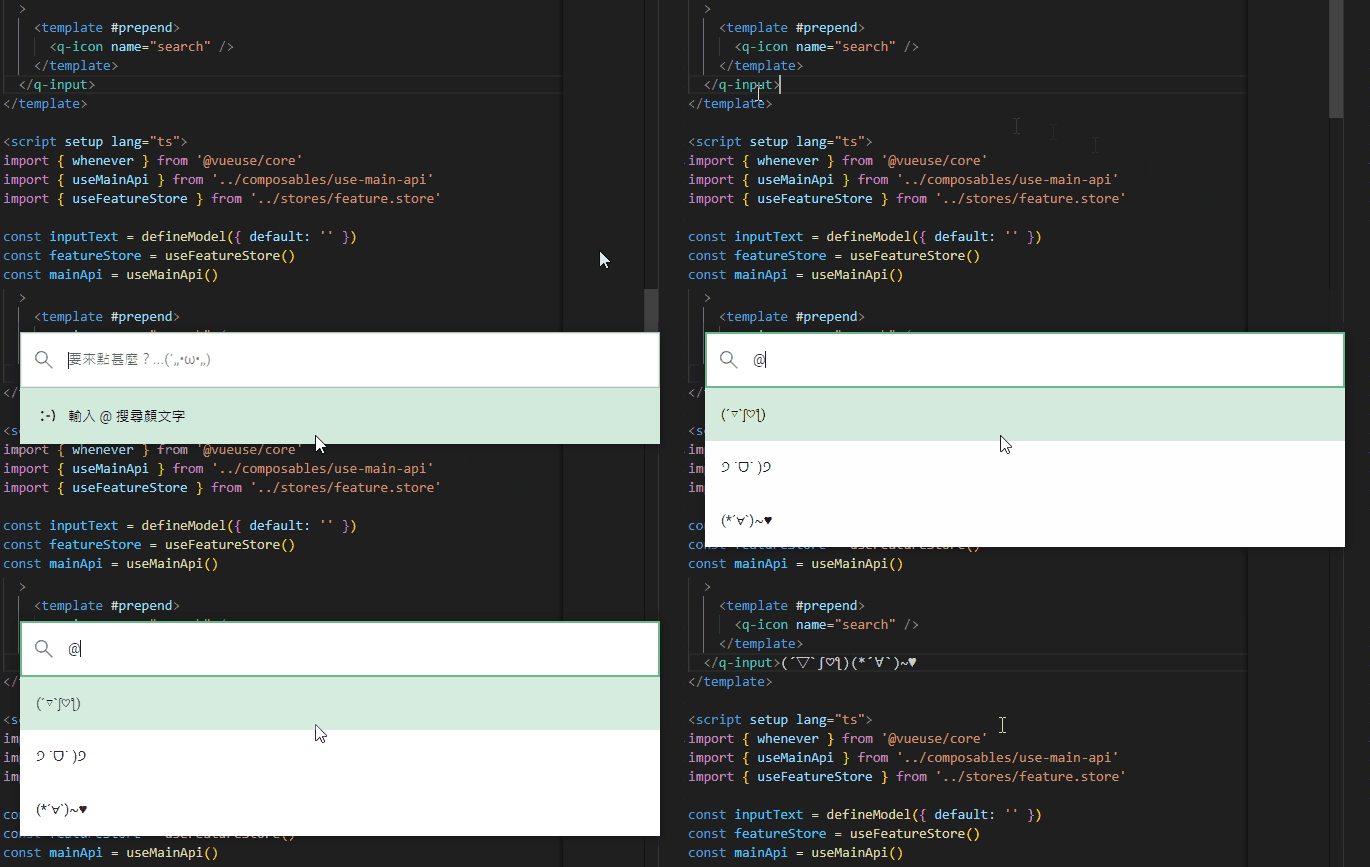
#### Google 搜尋
只有一個功能有點孤單,讓我們再新增一個可以快速開始 Google 搜尋的功能卡片吧!%(/≧▽≦)/%
這裡需要在 `mainApi` 新增一個 API,用來開啟瀏覽器。
`electron\electron-env.d.ts`
```ts
export interface MainApi {
// ...
openExternal: (url: string) => void;
}
// ...
```
`electron\preload.ts`
```ts
import { contextBridge, ipcRenderer } from 'electron'
contextBridge.exposeInMainWorld('main', {
// ...
openExternal(url: string) {
return ipcRenderer.send('openExternal', url)
},
})
```
`electron\main.ts`
```ts
// ...
function initIpcMain(mainWindow: BrowserWindow) {
// ...
ipcMain.on('openExternal', (event, url: string) => {
shell.openExternal(url)
})
}
// ...
```
這裡使用了 [`shell`](https://www.electronjs.org/docs/latest/api/shell) 模組,可以讓我們開啟外部瀏覽器。
接著讓我們新增 `feature-card-google` 功能卡片元件。
`src\domains\feature-card-google\index.vue`
```vue
```
接著在首頁引入功能卡片。
不過每次新增功能卡片都要手動引入好麻煩,讓我們自動引入吧!%( ´ ▽ \` )ノ%
`src\pages\index.vue`
```vue
```
::: tip
這裡使用了 Vite 的 [glob 功能](https://vite.dev/guide/features#glob-import)
:::
現在可以輸入任何內容並開啟瀏覽器跳轉 Google 搜尋了!%◝(≧∀≦)◟%
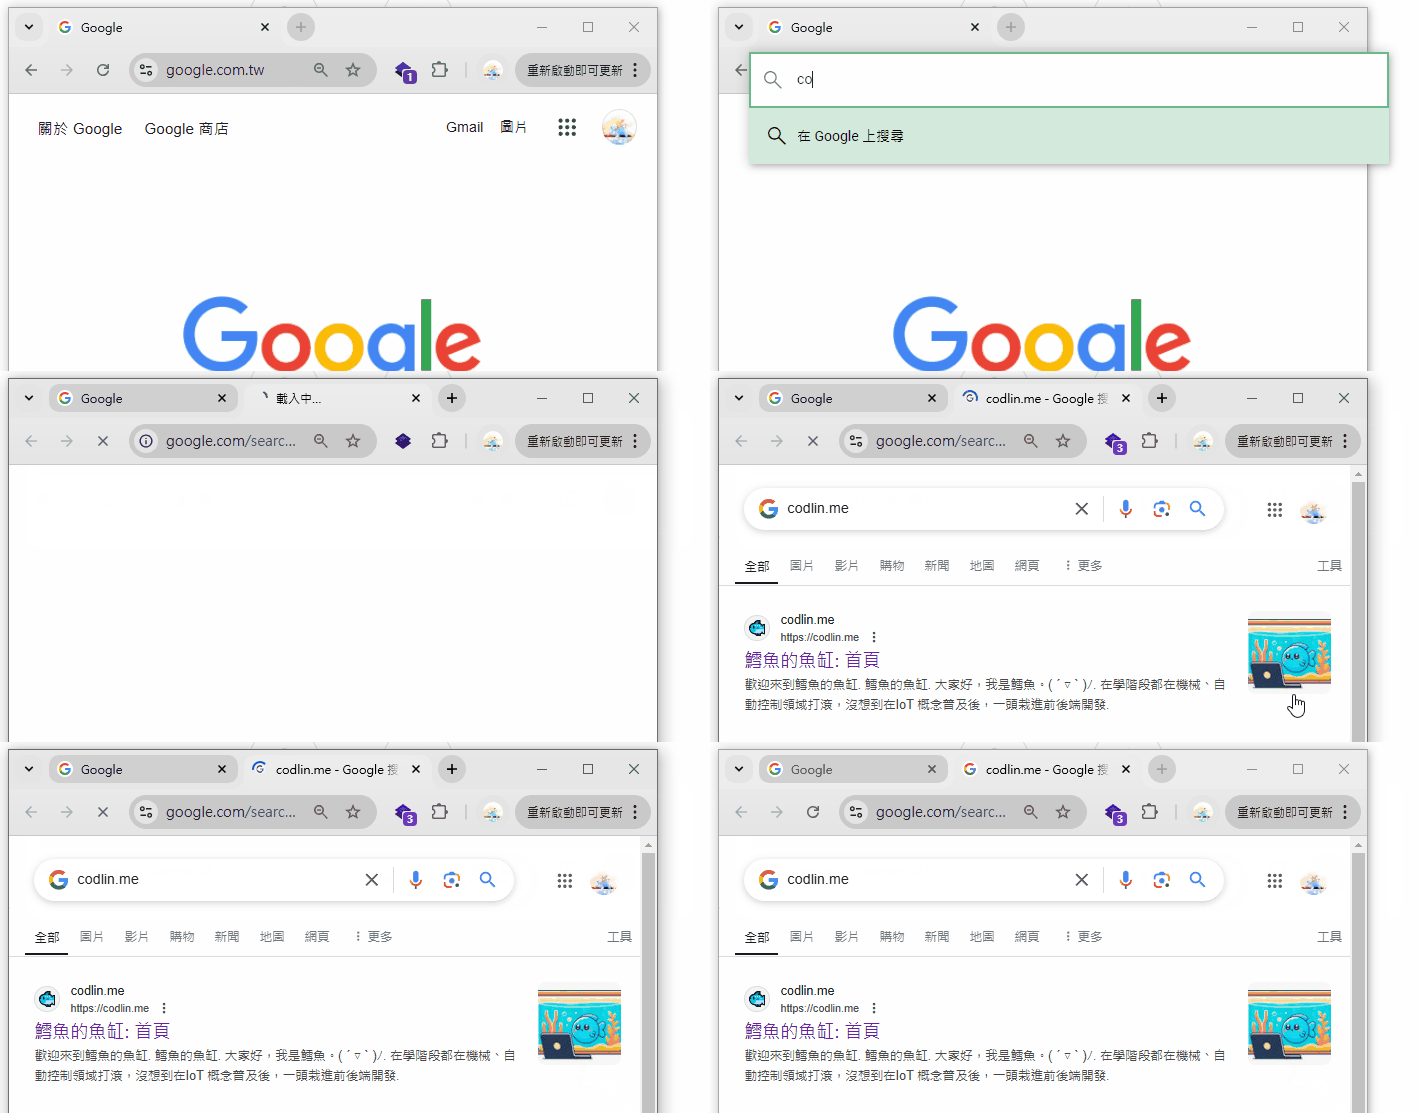
核心功能基本上都完成了,感覺超讚!%(≧∇≦)ノ%
## 總結 🐟
以上程式碼可以[在此取得](https://github.com/Codfisher/side-project-cod-toys/tree/feat/feature-card)
* 完成依照關鍵字候選功能選項
* `ipcRenderer` 可以讓網頁與 main process 通訊
* 完成搜尋顏文字與 Google 搜尋功能
下一章讓我們來實作連接 Notion Database 與模糊搜尋吧。%(≖‿ゝ≖)✧%
::: tip
因為篇幅問題,某些部分簡單帶過。
若想看到更詳細的解釋,請不吝留言或寫信給我喔!%(\*´∀\`)~♥%
:::