VitePress 之所以我說那個響應式圖片呢?
此部落格原本使用 Nuxt Content 開發,但是因為 Nuxt Content 把文章也算在 Server 資源內,導致編譯後尺寸超過 Cloudflare Workers 上限。
頹廢擱置好長一段時間後,最近終於有時間改用 VitePress 重構了。
不過 VitePress 沒有 Nuxt Image 可以自動處理響應式圖片,手動處理實在是要魚命。...(›´ω`‹ )
身為一個稱職的碼農,當然要自動處理啊。⎝(・ω´・⎝)
結果找不到適合、現成的外掛,只好自己想辦法了。ლ(・´ェ`・ლ)
如果大大們有更好的解法,請不要告訴我,我已經做完了,說說的啦,還是告訴我好了。(*´∀`)~♥
何謂響應式圖片?
響應式圖片是指根據裝置解析度,提供不同尺寸的圖片,以達到最佳的使用者體驗。
例如:手機解析度較低,就不需要載入高解析度的圖片,以節省流量。
詳細內容推薦看看這篇文章:Responsive images。
解決方案
搜尋、研究了一下,目前總結出來的步驟為:
- 建立一個產生響應式圖片的腳本
- 在
buildEnd階段執行腳本 - 擴展 markdown-it,將 image 標籤替換為自定義 Vue 元件(
base-image) - 開發
base-image元件,產生約定好的圖片尺寸之 srcset 屬性
方向有了,現在來實作吧!◝( •ω• )◟
產生響應式圖片
這個部分很單純,基本上就是取得所有圖片後,使用 sharp 產生圖片
import fs from 'node:fs'
import path from 'node:path'
import { map, pipe } from 'remeda'
import sharp from 'sharp'

const IMAGE_PATH = path.resolve(__dirname, '../../content/public')
const OUTPUT_PATH = path.resolve(__dirname, '../../.vitepress/dist')

const IGNORE_NAME_LIST = [
  'favicon',
  // meme 檔案固定開頭
  'meme-',
]
const WIDTH_LIST = [700, 300]
const SUFFIX_NAME_LIST = ['.png', '.jpg', '.jpeg', '.webp']

// 是否為資料夾
function isDirectory(path: string) {
  return fs.lstatSync(path).isDirectory()
}

/** 取得所有圖片路徑 */
function getImagePathList(dirPath: string) {
  const files = fs.readdirSync(dirPath)
  const result: string[] = []

  for (const file of files) {
    const filePath = path.join(dirPath, file)
    const isDir = isDirectory(filePath)

    if (isDir) {
      result.push(...getImagePathList(filePath))
      continue
    }

    if (IGNORE_NAME_LIST.some((name) => file.includes(name))) {
      continue
    }

    const suffix = path.extname(file)
    if (!SUFFIX_NAME_LIST.includes(suffix)) {
      continue
    }

    result.push(filePath)
  }

  return result
}

export async function generateImages() {
  /** 取得所有圖片 */
  const imgList = getImagePathList(IMAGE_PATH)
  console.log(`[ generateImages ] 找到 ${imgList.length} 張圖片`)

  // 產生對應寬度圖片至 .vitepress/dist,檔名後面加上寬度
  for (const imgPath of imgList) {
    const img = fs.readFileSync(imgPath)
    const filePath = imgPath.replace(IMAGE_PATH, '').split('.')[0]

    try {
      const tasks = pipe(
        WIDTH_LIST,
        map((width) => {
          const outputPath = path.join(
            OUTPUT_PATH,
            `${filePath}-${width}.webp`,
          )

          return sharp(img)
            .resize({ width })
            .webp({ quality: 60, smartSubsample: true })
            .toFile(outputPath)
        }),
        // 輸出一張原圖 quality 60 版本
        (list) => {
          const outputPath = path.join(
            OUTPUT_PATH,
            `${filePath}.webp`,
          )

          list.push(sharp(img)
            .webp({ quality: 60, smartSubsample: true })
            .toFile(outputPath))

          return list
        },
      )

      await Promise.all(tasks)
    }
    catch (error) {
      console.error(`[ generateImages ] 圖片 ${imgPath} 產生失敗 :`, error)
    }
  }

  console.log(`[ generateImages ] 產生完成`)
}執行腳本
依照 VitePress 文件說法,.vitepress\config.mts 中有多個 Build Hooks 可以設定。
由於我只要建構後產生,所以在 buildEnd 階段執行即可。
.vitepress\config.mts
import { generateImages } from './scripts/resize-images'

// https://vitepress.dev/reference/site-config
export default ({ mode }) => {
  return defineConfig({
    // ...
    async buildEnd() {
      await generateImages()
    },
  })
}現在讓我們試試 build 後會不會跑出各種尺寸的圖片。(´・ω・`)
執行 build 後,沒有意外的話,應該要出現以下文字。
  vitepress v1.5.0

✓ building client + server bundles...
✓ rendering pages...
✓ generating sitemap...
[ generateImages ] 找到 43 張圖片
[ generateImages ] 產生完成
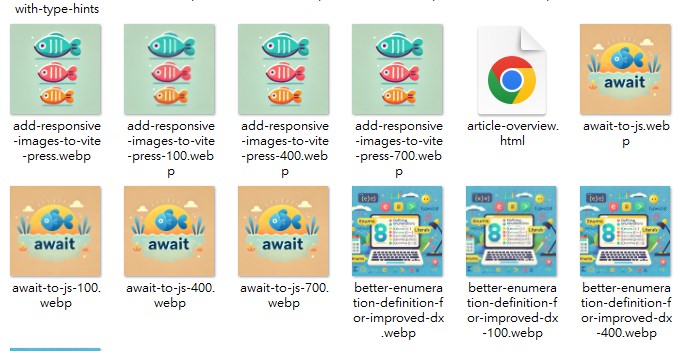
build complete in 11.75s.且 dist 資料夾內應該要跑出各種尺寸的圖片。

圖片出現了!◝(≧∀≦)◟
擴展 markdown-it
config.mts 中有保留欄位,可以設定自行拓展 markdown-it 功能。
新增一個 markdown-it 外掛,功能很單純,就是將 markdown 中的 img 標籤替換為 base-image 元件。
import type { RequiredDeep } from 'type-fest'
import type { UserConfig } from 'vitepress'
import { map, pipe } from 'remeda'

type MarkdownIt = Parameters<
  RequiredDeep<
    UserConfig['markdown']
  >['config']
>[0]

/** 將 img 轉換成 base-img 元件
 * https://vitepress.dev/guide/markdown#advanced-configuration
 *
 * @param md
 * @param mode 用於判斷是否為開發模式
 */
export function markdownItBaseImg(md: MarkdownIt, mode: string) {
  md.renderer.rules.image = (tokens, idx) => {
    const token = tokens[idx]
    if (!token) {
      return ''
    }

    const attrs = pipe(
      token.attrs ?? [],
      map(([key, value]) => {
        if (key === 'alt') {
          return `alt="${token.content}"`
        }

        return `${key}="${value}"`
      }),
    )

    return [
      `<base-img`,
      ...attrs,
      `/>`,
    ].join(' ')
  }
}開發元件
最後也是最重要的一步,開發 base-image 元件並產生 srcset 屬性。
<template>
  <picture>
    <template v-if="sourceVisible">
      <source
        v-if="isDark && !darkSrcError"
        :srcset="darkSrcset"
        type="image/webp"
      >
      <source
        :srcset="lightSrcset"
        type="image/webp"
      >
    </template>

    <img
      v-bind="imgProps"
      @error="darkSrcError = true"
    >
  </picture>
</template>

<script setup lang="ts">
import type { ImgHTMLAttributes } from 'vue'
import { join, map, pipe } from 'remeda'
import { useData } from 'vitepress'
import { computed, ref, useAttrs } from 'vue'

interface Props extends /* @vue-ignore */ ImgHTMLAttributes {
  src: string;
  /** 指定特定尺寸 */
  useSize?: typeof WIDTH_LIST[number];
}

const props = withDefaults(defineProps<Props>(), {
  useSize: undefined,
})

const { isDark } = useData()
const darkSrcError = ref(false)

const attrs = useAttrs()

const WIDTH_LIST = [700, 300] as const

// 去除附檔名
const fileName = computed(() => props.src
  .split('.')
  .slice(0, -1)
  .join('.'),
)

const src = computed(() => isDark.value ? props.src.replace('.webp', '-dark.webp') : props.src)
const imgProps = computed(() => ({
  ...props,
  ...attrs,
  src: src.value,
}))

/** 抽取邏輯:根據傳入的檔名 (baseName) 產生對應的 srcset 字串
 */
function getSrcset(baseName: string) {
  // 指定特定尺寸
  if (props.useSize) {
    return `${baseName}-${props.useSize}.webp`
  }

  // 產生響應式清單
  return pipe(
    WIDTH_LIST,
    map((size) => `${baseName}-${size}.webp ${size}w`),
    join(', '),
  )
}

/** 一般模式的 srcset */
const lightSrcset = computed(() => getSrcset(fileName.value))

/** 暗黑模式的 srcset
 * 邏輯:在原檔名後加上 -dark
 * 例如:image-700.webp -> image-dark-700.webp
 */
const darkSrcset = computed(() => getSrcset(`${fileName.value}-dark`))

const sourceVisible = computed(() => {
  /** DEV 模式不顯示響應式圖片 */
  if (import.meta.env.DEV) {
    return false
  }

  /** gif 不特別處理 */
  return !props.src.includes('.gif')
})
</script>接著將 base-image 註冊為全域元件。
.vitepress\theme\index.ts
import type { Theme } from 'vitepress'
// https://vitepress.dev/guide/custom-theme
import BaseImg from '../../web/components/base-img.vue'

export default {
  // ...
  enhanceApp({ app, router, siteData }) {
    app.component('BaseImg', BaseImg)
  },
} satisfies Theme實測
現在讓我們執行 vitepress preview,來試試看效果如何吧。

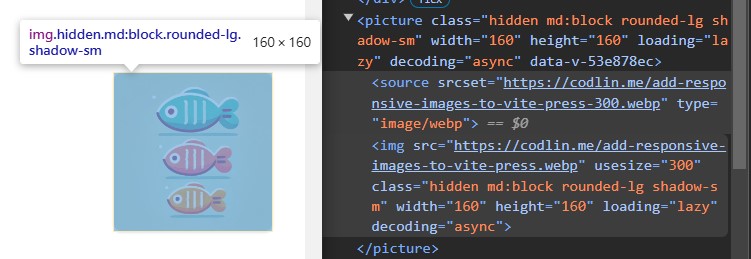
可以注意到原本的 img 標籤已替換為 picture 標籤(base-image 元件),並且產生了 srcset 屬性。
大功告成!੭ ˙ᗜ˙ )੭
總結 🐟
- 使用 sharp 產生多種尺寸圖片
- 擴展 markdown-it,將 image 標籤替換為自定義 Vue 元件(
base-image) - 藉由
base-image元件產生約定好的圖片尺寸之 srcset 屬性
以上我們完成自動產生、替換響應式圖片的功能了!✧⁑。٩(ˊᗜˋ*)و✧⁕。
其實還有很多細節可以處理,例如:如果圖片小於目標尺寸,就不需要產生新圖片等等。
我就不剝奪其他人實驗的機會了,留給大大們自己嘗試惹。
要改得太多惹,我決定改天!ᕕ( ゚ ∀。)ᕗ