CodToys - EP02:功能選項
上一章節我們完成了快捷鍵開關視窗功能,這一章節我們來實作功能選項部分吧!
開發
本章節預計會建立以下內容:
- 輸入候選:在輸入框輸入內容時,會顯示候選功能選項
- 功能選項:提供使用者選擇功能,且可以透過滑鼠或鍵盤選擇
- 建立「搜尋顏文字、Google 搜尋」功能
功能選項元件
第一步讓我們新增功能選項元件
src\components\feature-option.vue
<template>
  <div
    ref="optionRef"
    class="flex items-center gap-2 duration-300"
    :class="{ 'bg-primary/30': selected }"
    @click="props.action()"
  >
    <q-icon
      v-if="props.icon"
      :name="props.icon"
      size="1.5rem"
    />
    <slot>
      {{ props.text }}
    </slot>
  </div>
</template>

<script setup lang="ts">
import { useElementHover } from '@vueuse/core'
import { computed, ref } from 'vue'

interface Props {
  icon?: string;
  text?: string;
  action?: () => void;
}
const props = withDefaults(defineProps<Props>(), {
  action: () => () => { },
})

defineSlots<{
  default?: () => unknown;
}>()

const optionRef = ref<HTMLDivElement>()
const isHover = useElementHover(optionRef)
const selected = computed(() => isHover.value)
</script>此元件負責呈現可用的功能選項,並且可以透過 action 來設定點擊後的行為。
滑鼠 hover 或使用鍵盤選擇時,會變更背景色,這裡預留 selected,晚點來實作鍵盤導航功能。
在使用 feature-option 元件前,先讓我們封裝一下目前的輸入框元件。
src\components\main-input.vue
<template>
  <q-input
    v-model="inputText"
    placeholder="要來點甚麼?...(´,,•ω•,,)"
    autofocus
    outlined
    square
  >
    <template #prepend>
      <q-icon name="search" />
    </template>
  </q-input>
</template>

<script setup lang="ts">
const inputText = defineModel({ default: '' })
</script>最後在首頁中引入 feature-option 與 main-input 元件。
src\pages\index.vue
<template>
  <div class="flex-col">
    <main-input v-model="inputText" />

    <div class="flex-col">
      <feature-option
        text="選項 1"
        class="p-4"
      />
      <feature-option
        text="選項 2"
        class="p-4"
      />
    </div>
  </div>
</template>

<script setup lang="ts">
import { ref } from 'vue'
import FeatureOption from '../components/feature-option.vue'
import MainInput from '../components/main-input.vue'

const inputText = ref('')
</script>看起來是不是乾淨很多呢?ヾ(◍'౪`◍)ノ゙
現在讓我們打開視窗。

...會發現「選項 2」被切掉啦!Σ(ˊДˋ;)
這是因為視窗高度沒有隨著內容增加而增加,讓我們來修正一下吧。
自動調整視窗高度
由於視窗由 main process 控制,我們需要讓視窗與 main process 通訊並調整視窗大小。
使用 preload.ts 來對 renderer process,也就是網頁視窗提供直通 main process 的 API 吧。
甚麼 process?(*´・д・)
Electron 基於 multi-process 架構,詳細請參考官方文件。
electron\preload.ts
import { contextBridge, ipcRenderer } from 'electron'

contextBridge.exposeInMainWorld('main', {
  updateHeight(height: number) {
    return ipcRenderer.send('updateHeight', height)
  },
  hideWindow() {
    return ipcRenderer.send('hideWindow')
  },
})ipcRenderer 模組提供了 send 方法,可以將事件發送到 main process。
contextBridge 模組則負責將 main 物件注入在 window 中,我們可以在網頁中使用 window.main 來呼叫 main process 的方法。
接著我們要在 main process 中接收這些事件,使用 ipcMain 模組來收聽事件,順便重構一下 main 程式碼。
electron\main.ts
import path from 'node:path'
import process from 'node:process'
import {
  app,
  BrowserWindow,
  globalShortcut,
  ipcMain,
  screen,
} from 'electron'

async function createInputWindow() {
  const display = screen.getPrimaryDisplay()

  const newWindow = new BrowserWindow({
    width: display.bounds.width / 3,
    height: 100,
    show: false,
    backgroundColor: '#fff',
    frame: false,
    resizable: false,
    webPreferences: {
      preload: path.join(__dirname, './preload.js'),
    },
  })
  // 隱藏預設系統選單
  newWindow.setMenu(null)

  // 失去焦點時自動隱藏視窗
  newWindow.on('blur', () => {
    newWindow.hide()
  })

  if (process.env.VITE_DEV_SERVER_URL) {
    await newWindow.loadURL(process.env.VITE_DEV_SERVER_URL)
  }
  else {
    await newWindow.loadFile('dist/index.html')
  }

  return newWindow
}

function initGlobalShortcut(mainWindow: BrowserWindow) {
  const ret = globalShortcut.register('Ctrl+Space', () => {
    if (mainWindow?.isVisible()) {
      // focusable 設為 false,才可以讓焦點回到原本位置。例如正在輸入的編輯器
      mainWindow.setFocusable(false)
      mainWindow.hide()

      return
    }

    const cursorPoint = screen.getCursorScreenPoint()
    const display = screen.getDisplayNearestPoint(cursorPoint)

    // 設定滑鼠位置之視窗中間往上 1/3 的位置
    const [width, height] = mainWindow.getSize()
    if (!width || !height)
      return

    mainWindow?.setPosition(
      Math.floor(display.bounds.x + display.bounds.width / 2 - width / 2),
      Math.floor(display.bounds.y + display.bounds.height / 3 - height / 2),
    )

    mainWindow.setFocusable(true)
    mainWindow.show()
  })

  if (!ret) {
    console.error('registration failed')
  }
}

function initIpcMain(mainWindow: BrowserWindow) {
  ipcMain.on('updateHeight', (event, height: number) => {
    mainWindow.setBounds({ height })
  })

  ipcMain.on('hideWindow', (event) => {
    mainWindow.setFocusable(false)
    mainWindow.hide()
  })
}

app.whenReady().then(async () => {
  const mainWindow = await createInputWindow()

  initGlobalShortcut(mainWindow)
  initIpcMain(mainWindow)
})

app.on('window-all-closed', () => {
  if (process.platform !== 'darwin') {
    app.quit()
  }

  globalShortcut.unregisterAll()
})現在我們需要在網頁中使用 mainApi,既然是 TypeScript 專案,第一步當然是定義型別啦。
electron\electron-env.d.ts
export interface MainApi {
  updateHeight: (height: number) => void;
  hideWindow: () => void;
}

declare global {
  interface Window {
    main: MainApi;
  }
}

export { }接著把 contextBridge 模組注入的 main 物件透過 Composition API 形式提供,保留未來更動彈性。
src\composables\use-main-api.ts
/** 提供 Electron main process API */
export function useMainApi() {
  return window.main
}現在讓視窗根據內容高度自動調整,使用 useElementBounding 輕鬆完成!ヽ(●`∀´●)ノ
<template>
  <div
    ref="pageRef"
    class="flex-col"
  >
    // ...
  </div>
</template>

<script setup lang="ts">
const mainApi = useMainApi()

const inputText = ref('')

// 同步視窗與頁面高度
const pageRef = ref<HTMLDivElement>()
const { height } = useElementBounding(pageRef)

watchEffect(() => {
  mainApi.updateHeight(height.value)
})
</script>現在開啟視窗,可以看到這次選項 2 順利出現了。

最後我們把原本在 main.ts 中的「視窗 blur 時自動隱藏視窗」的邏輯移到首頁中,方便未來依頁面需求自定義。
electron\main.ts
// ...
async function createInputWindow() {
  // ...

  // 失去焦點時自動隱藏視窗
  newWindow.on('blur', () => {
    newWindow.hide()
  })

  // ...
}
// ...所以網頁中要怎麼判斷視窗是否 blur?(´・ω・`)
其實很簡單,透過 useWindowFocus 輕鬆實現!
src\pages\index.vue
<template>
  // ...
</template>

<script setup lang="ts">
// ...

// 視窗 blur 時,清空 inputText 並隱藏視窗
const focused = useWindowFocus()
whenever(
  () => !focused.value,
  () => {
    inputText.value = ''
    mainApi.hideWindow()
  },
)
</script>感恩 VueUse!讚嘆 VueUse!(*´∀`)~♥
鍵盤導航
選項有了,那就來實作鍵盤導航功能吧。
這裡讓 feature-option 元件註冊自己的 ID,透過 ID 選擇可用的 option。
建立一個 feature.store.ts 來管理並註冊 option。
src\stores\feature.store.ts
import { defineStore } from 'pinia'
import { pipe, sortBy } from 'remeda'
import { computed, ref, shallowRef, triggerRef } from 'vue'

interface OptionValue {
  action: () => void;
}

export const useFeatureStore = defineStore('feature', () => {
  const optionMap = shallowRef(new Map<string, OptionValue>())
  const optionIdList = computed(() => pipe(
    [...optionMap.value.keys()],
    /** 依照數字排序,保證 option 順序 */
    sortBy((id) => Number.parseInt(id.replace(/\D/g, ''), 10)),
  ))

  function addOption(id: string, value: OptionValue) {
    optionMap.value.set(id, value)
    triggerRef(optionMap)
  }
  function removeOption(id: string) {
    optionMap.value.delete(id)
    triggerRef(optionMap)
  }

  const selectedOptionId = ref('')
  function setOption(id: string) {
    selectedOptionId.value = id
  }
  function nextOption() {
    const first = optionIdList.value.at(0)

    const index = optionIdList.value.indexOf(selectedOptionId.value)
    if (index < 0 && first) {
      selectedOptionId.value = first
      return
    }

    const target = optionIdList.value[index + 1]
    if (target || first) {
      selectedOptionId.value = (target ?? first)!
    }
  }
  function prevOption() {
    const last = optionIdList.value.at(-1)

    const index = optionIdList.value.indexOf(selectedOptionId.value)
    if (index < 0 && last) {
      selectedOptionId.value = last
      return
    }

    const target = optionIdList.value[index - 1]
    if (target || last) {
      selectedOptionId.value = (target ?? last)!
    }
  }

  const currentOption = computed(() => optionMap.value.get(selectedOptionId.value))

  return {
    optionIdList,
    addOption,
    removeOption,

    selectedOptionId,
    setOption,
    nextOption,
    prevOption,

    currentOption,
  }
})feature.store 主要提供以下邏輯:
- 註冊、移除 option
- 設定或前後選擇 option
接著在 feature-option 新增邏輯:
- 註冊自己的 ID 與
action onUnmounted時移除 ID。selected依照feature.store資料判斷
src\components\feature-option.vue
<template>
  // ...
</template>

<script setup lang="ts">
// ...

const featureStore = useFeatureStore()

const id = useId()

featureStore.addOption(id, {
  action: props.action,
})
onUnmounted(() => {
  featureStore.removeOption(id)
})

// ...
const selected = computed(
  () => isHover.value || featureStore.selectedOptionId === id,
)
</script>最後讓我們在 main-input 中註冊鍵盤事件,實現鍵盤選擇選項功能。
src\components\main-input.vue
<template>
  <q-input
    ...
    @keydown="handleKeydown"
  >
    // ...
  </q-input>
</template>

<script setup lang="ts">
// ...
const keydownEventMap: Record<
  /** key name
   *
   * https://developer.mozilla.org/zh-CN/docs/Web/API/UI_Events/Keyboard_event_key_values
   */
  string,
  (event: KeyboardEvent) => Promise<void>
> = {
  async Escape() {
    // 已清空則隱藏視窗
    if (inputText.value === '') {
      mainApi.hideWindow()
    }

    inputText.value = ''
  },
  async ArrowDown(event) {
    event.preventDefault()
    featureStore.nextOption()
  },
  async ArrowUp(event) {
    event.preventDefault()
    featureStore.prevOption()
  },
  async Enter() {
    featureStore.currentOption?.action()
  },
}
function handleKeydown(event: KeyboardEvent) {
  keydownEventMap[event.key]?.(event)
}
</script>現在我們可以透過鍵盤觸發以下功能:
- Escape 清空輸入框,若內容為空則隱藏視窗
- 上下鍵選擇選項
- Enter 執行選項。

越來越有模有樣了!✧⁑。٩(ˊᗜˋ*)و✧⁕。
新增功能卡片
接著讓我們新增功能卡片,功能卡片會自動根據使用者輸入內容提供可用選項。
可預期每個卡片都會有自己的專屬邏輯,所以我們將卡片元件獨立在 domains 資料夾中。
搜尋顏文字
src\domains\feature-card-kaomoji\index.vue
<template>
  <template v-if="visible">
    <feature-option
      v-if="!isFeature"
      class="p-4"
      icon="emoticon"
      text="輸入 @ 搜尋顏文字"
      :action="() => setText('@')"
    />

    <template v-else>
      <feature-option
        v-for="text, i in textList"
        :key="i"
        class="p-4"
        :text
        :action="() => copy(text)"
      />
    </template>
  </template>
</template>

<script setup lang="ts">
import { computed } from 'vue'
import FeatureOption from '../../components/feature-option.vue'
import { useMainApi } from '../../composables/use-main-api'

const mainApi = useMainApi()

const inputText = defineModel({ default: '' })

const visible = computed(() => {
  return !inputText.value || inputText.value.startsWith('@')
})

const isFeature = computed(() => inputText.value.startsWith('@'))

function setText(text: string) {
  inputText.value = text
}

function copy(text: string) {
  navigator.clipboard.writeText(text)
  mainApi.hideWindow()
}

const textList = [
  '(´▽`ʃ♡ƪ)',
  '੭ ˙ᗜ˙ )੭',
  '(*´∀`)~♥',
]
</script>因為還沒連接資料庫,所以先暫時寫死 3 個顏文字測試功能。
接著在首頁中引入功能卡片。
src\pages\index.vue
<template>
  <div>
    // ...

    <div class="flex-col">
      <feature-card-kaomoji v-model="inputText" />
    </div>
  </div>
</template>

<script setup lang="ts">
import FeatureCardKaomoji from '../domains/feature-card-kaomoji/index.vue'
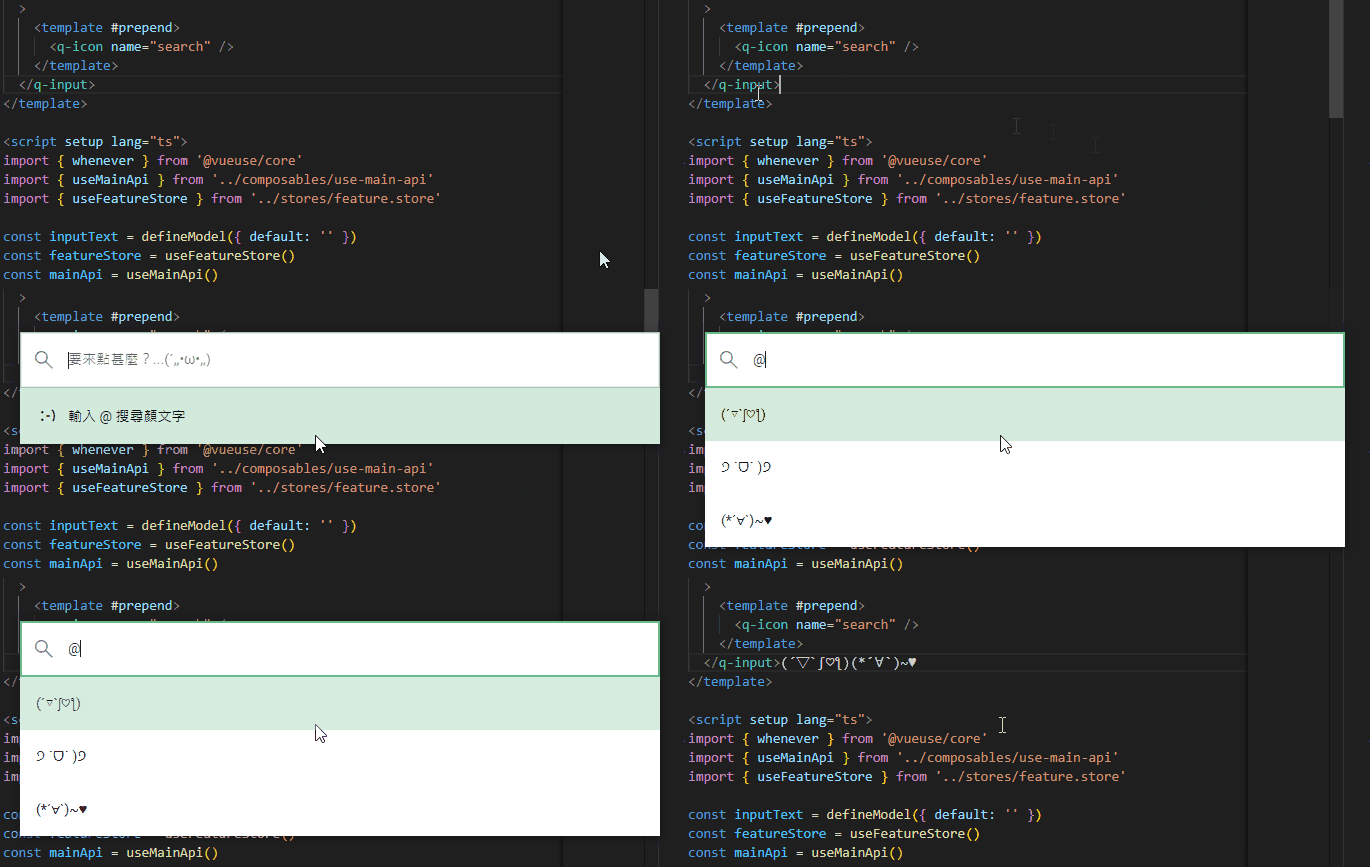
</script>現在輸入 @ 即可搜尋顏文字,而且選擇後可以直接複製到剪貼簿。

Google 搜尋
只有一個功能有點孤單,讓我們再新增一個可以快速開始 Google 搜尋的功能卡片吧!(/≧▽≦)/
這裡需要在 mainApi 新增一個 API,用來開啟瀏覽器。
electron\electron-env.d.ts
export interface MainApi {
  // ...
  openExternal: (url: string) => void;
}

// ...electron\preload.ts
import { contextBridge, ipcRenderer } from 'electron'

contextBridge.exposeInMainWorld('main', {
  // ...
  openExternal(url: string) {
    return ipcRenderer.send('openExternal', url)
  },
})electron\main.ts
// ...

function initIpcMain(mainWindow: BrowserWindow) {
  // ...

  ipcMain.on('openExternal', (event, url: string) => {
    shell.openExternal(url)
  })
}

// ...這裡使用了 shell 模組,可以讓我們開啟外部瀏覽器。
接著讓我們新增 feature-card-google 功能卡片元件。
src\domains\feature-card-google\index.vue
<template>
  <feature-option
    v-if="visible"
    class="p-4"
    icon="search"
    text="在 Google 上搜尋"
    :action
  />
</template>

<script setup lang="ts">
import { computed } from 'vue'
import FeatureOption from '../../components/feature-option.vue'
import { useMainApi } from '../../composables/use-main-api'

const mainApi = useMainApi()

const inputText = defineModel({ default: '' })

const visible = computed(() => {
  if (!inputText.value) {
    return false
  }

  return !inputText.value.startsWith('@')
})

function action() {
  const url = [
    `https://www.google.com/search?q=`,
    encodeURIComponent(inputText.value),
  ].join('')
  mainApi.openExternal(url)
  mainApi.hideWindow()
}
</script>接著在首頁引入功能卡片。
不過每次新增功能卡片都要手動引入好麻煩,讓我們自動引入吧!( ´ ▽ ` )ノ
src\pages\index.vue
<template>
  <div>
    // ...

    <div class="flex-col">
      <component
        :is="card"
        v-for="card, key in featureCards"
        :key
        v-model="inputText"
      />
    </div>
  </div>
</template>

<script setup lang="ts">
const featureCards = import.meta.glob('../domains/feature-card-*/index.vue', {
  import: 'default',
  eager: true,
})

// ...
</script>TIP
這裡使用了 Vite 的 glob 功能
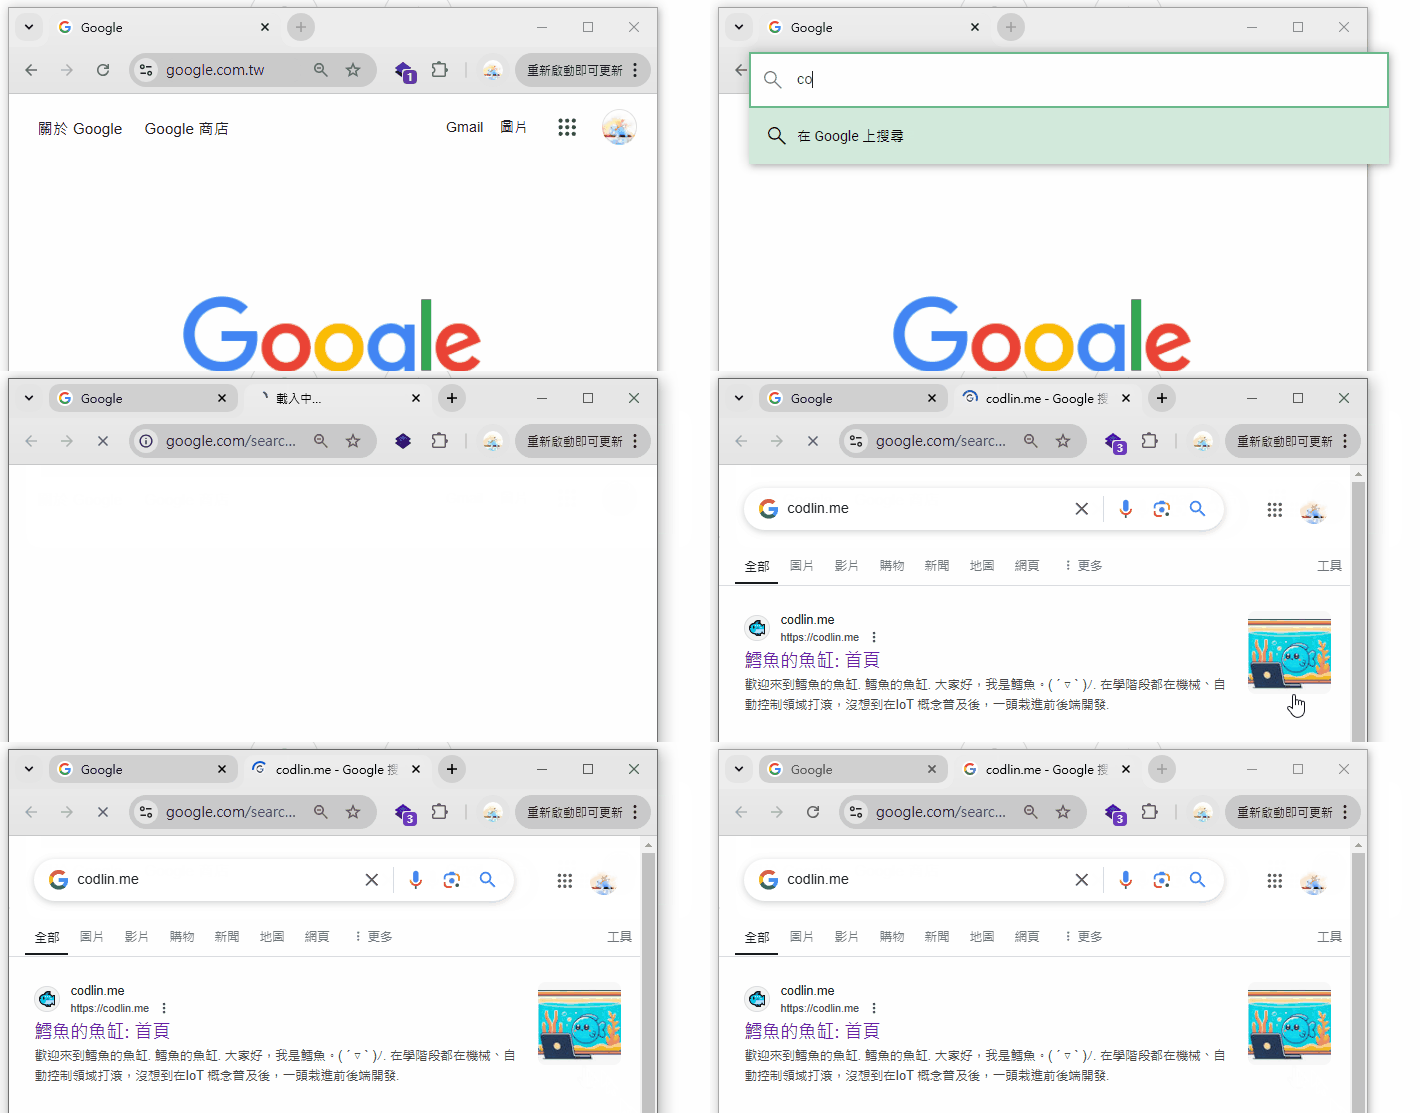
現在可以輸入任何內容並開啟瀏覽器跳轉 Google 搜尋了!◝(≧∀≦)◟

核心功能基本上都完成了,感覺超讚!(≧∇≦)ノ
總結 🐟
以上程式碼可以在此取得
- 完成依照關鍵字候選功能選項
ipcRenderer可以讓網頁與 main process 通訊- 完成搜尋顏文字與 Google 搜尋功能
下一章讓我們來實作連接 Notion Database 與模糊搜尋吧。(≖‿ゝ≖)✧
TIP
因為篇幅問題,某些部分簡單帶過。
若想看到更詳細的解釋,請不吝留言或寫信給我喔!(*´∀`)~♥